Have you ever wanted to rearrange mats in Cricut Design Space to get the most out of your vinyl or cardstock? There’s a really easy way to move items from one mat to another and rearrange them to save on materials.
Step 1
Once your project is designed in Cricut Design Space, click “make it”. You will then be taken to your mats section to edit and rearrange mats before making the cuts. If you need to duplicate your design, you can do so from this screen. Just go up to the “project copies” section in the top left corner and put in the number of times you want your design duplicated then hit “apply”.
Step 2
One you have your design duplicated (if needed) and Cricut has sorted it onto the mats, you’re ready to rearrange mats. Simply click the item you want to move and then click the three dots on the top left hand corner.
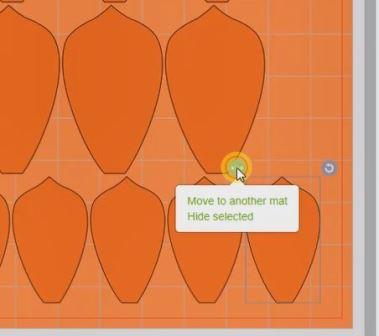
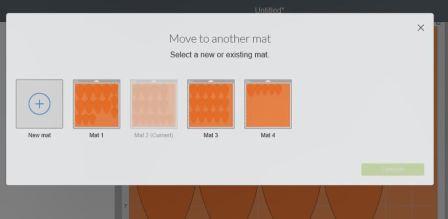
From here, select “move to another mat” and then choose which mat you want to move the item to. In the project I used for this example I was able to go from 4 mats down to 3 mats for my project saving a whole sheet of cardstock.
That’s it, you’re all done. Just keep moving items from one mat to another until you have everything where you want it and you’re all done. Check out the video to see how I rearrange mats and rotate items to maximize space.
Want to see what I made with these petals…Check out the paper flower tutorial here.
For more helpful Cricut Design Space tips and tutorials, subscribe to my newsletter. Once a week I’ll send an email with new Cricut posts from the blog along with a free Cricut Craft, A free font download and a super cheap SVG file. These items change weekly so you wont want to miss a week.