Why do I need an Etsy Shop Banner?
99% of shoppers are not going to buy your item right then and there. They’re going to click through to your shop first to find out a little more about you and the products you offer. The first thing they’re going to see is your Etsy Shop Banner. You need to show them what you’re about and what you have to offer in that banner and it needs to look PROFESSIONAL!
I don’t know about you but I’m not a fan of hiring someone to do things for me if there’s any way I can do them myself. I’m also not a web or graphics designer so that left me doing a lot of research on programs I could easily use to design my graphics that didn’t break the bank.
Canva to the rescue
I kept hearing about Canva and I tried it out a couple times but I absolutely hated it! I don’t really know why I hated it but I sure didn’t see what everyone was raving about. Nevertheless, every Pinterest search, Google search, or any kind of other search for that matter, kept leading me back to Canva. There had to be something to this Canva thing so I decided to really get in there and learn it. I spent a good deal of time just playing around with Canva and learning the features and functions and guess what?! Everyone was totally right. Canva is the BOMB! And better yet, it’s 100% FREE!
I use Canva for all of my graphics now. I use it for Etsy, for Pinterest, for my blog, for my other social media marketing. I literally use it for All. The. Things.
Here’s how to create your Etsy Shop Banner
Step One:
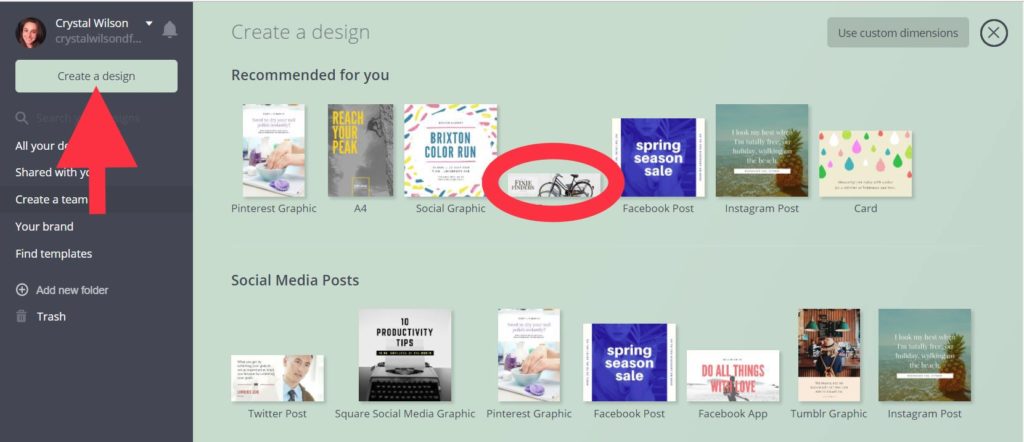
Go to canva.com and select “Create a Design” and then “Etsy Cover Photo”. These designs are perfectly sized for a full size Etsy shop Banner. (Side note, Canva does have a paid version which I opted to use so my screen may look a little different than yours. You don’t need the paid version for this though. You can do it all for free.)
Step Two:
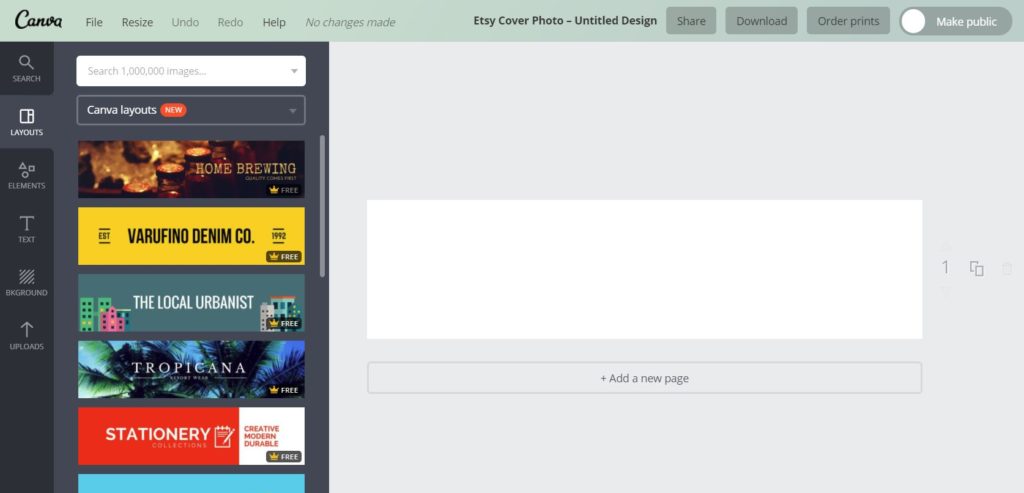
Canva will show you some premade layouts on the left side. If you like any of them, feel free to use them. You can edit them however you’d like. (I will say this is what threw me off Canva to begin with. I liked some things about the premade layouts but not others and I didn’t know how to use Canva well enough to make the changes I wanted. I finally learned but man, it frustrated me at first.)
 Step Three:
Select background from the left hand menu and choose your background color. You will see your entire banner fill with this color.
Step Four:
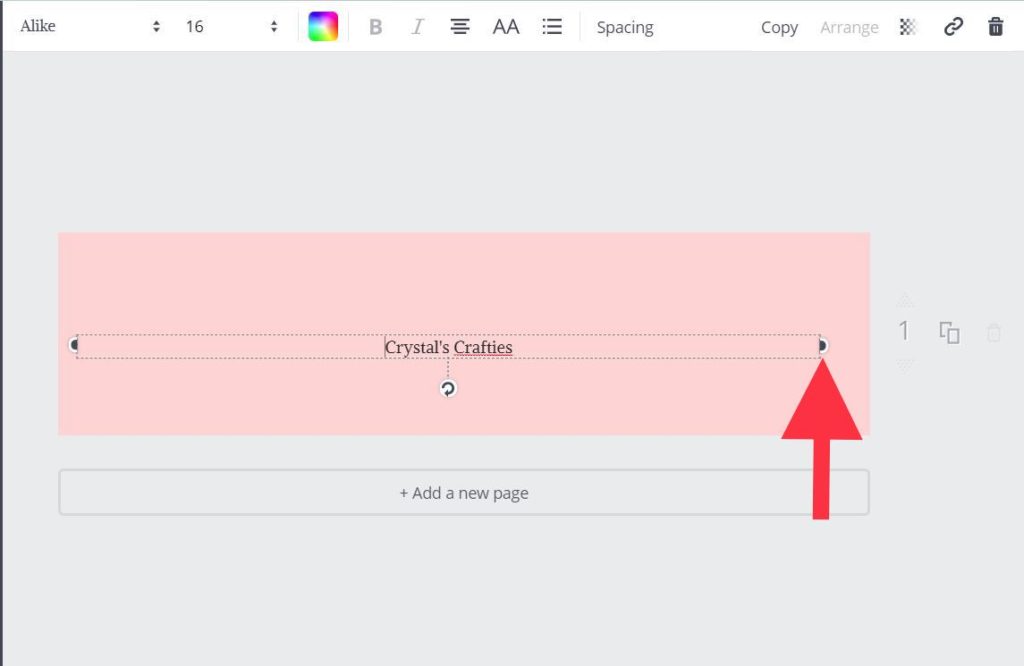
Add some text. DO NOT use the text button on the left hand menu. I has prefilled text layouts and you’ll want to design your own to fit the Etsy Banner. Instead just click anywhere in your design and type the letter “t”. No Ctrl, no shift…just “t” and you’ll get a text box where you can enter your shop name.

Step Five:
Once you’ve entered your shop name, use the handles on either side of the text box to pull the box out large enough to fit your whole banner. Then you can head up to the top menu bar and select your text font, size, color and all that good stuff.
 Step Six:
Next add your tag line. Say a little something that makes your shop special. I like to change mine up to whatever specials or deals I’m offering at the time. Right now I’m offering free shipping so I’m going to let everyone know that.
 Step Seven:
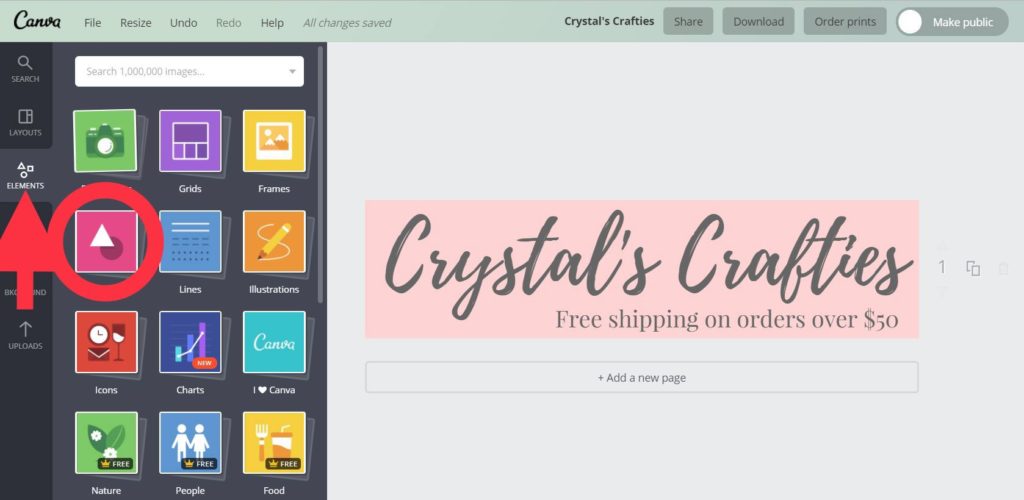
Then you need to add some extras. Head over to the left menu bar and select “Elements” and then “Shapes”. From here you can go crazy and do whatever you’d like. I used the hollow square and added a border to my text. I then changed the color of my box and resized it.
 Step Eight:
More extras. Head to the search bar and type in something fitting for your shop. It’s currently spring time so I typed in “flower”. You’ll see tons of designs come up. Some for free and some for $1USD. I almost always go free. I chose a cute little bluish flower and added it to my design.

Step Nine:
You’ll want to coordinate all of your colors so that everything isn’t a hot mess. I revised the color of my blue text border to match the blue flowers. To do that just highlight the element you want to change, select the “+” under document colors and you’ll get a color wheel. You can then choose any color your little heart desires. (Note: You can change the colors of some premade designs like the flowers and some of them you cannot change. Make sure you either like the color or can change it before you get too attached to it.)
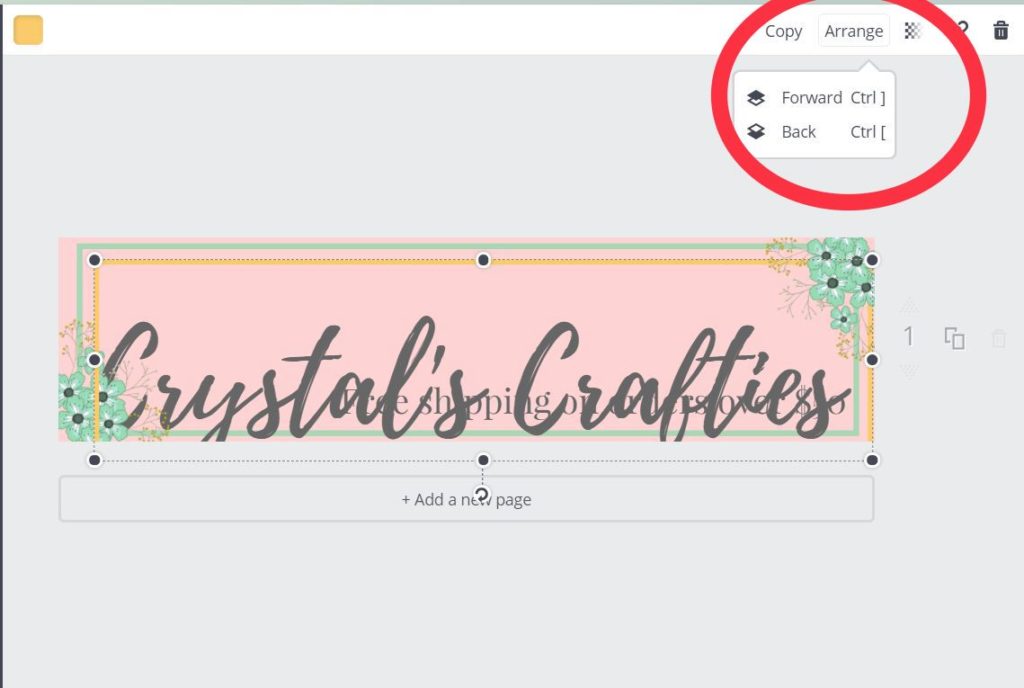
 I also added another yellow/gold text box offset to the first one to match the baby’s breath in the flower design. Adding this in after everything else put the new box on the top layer which means it was on top of my flowers and some of my text. That didn’t look good. You can bring forward or move back layers however you want. To do this just select the layer you want to adjust and go to the top menu bar. Click “Arrange” and either move the layer up or down. I moved this box down to the bottom so it was behind all of my text and flowers.
The options are endless but remember, less is more. Don’t go overboard. Once you have a banner you’re happy with head up to the top menu bar, select “Download” and save it as a PNG.
With Canva being that easy and free you can change up your banner as often as you’d like. I change mine with the holidays and whenever I’m offering a new special. Go give it a try!
And if you prefer video, here’s a quick video showing you how to create your Etsy Shop Banner using Canva.
PS. Sign up for my weekly Etsy newsletter and receive this FREE email course. The 5 day Etsy challenge. Click here to sign up. You’ll receive an email each day over the course of 5 days designed to boost your Etsy views and sales.
