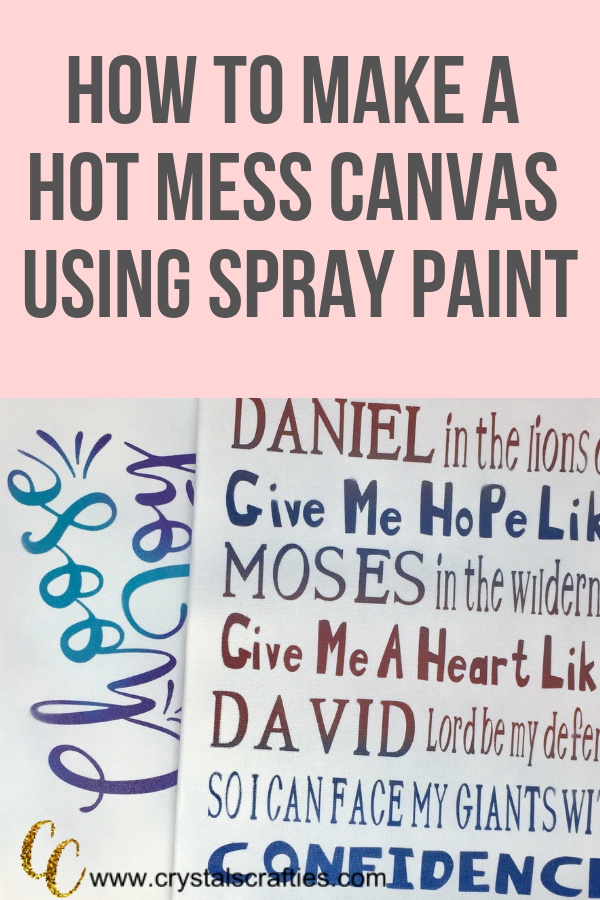
A hot mess canvas is the kind of project you just can’t mess up. It’s called a hot mess canvas for a reason…because it’s a hot mess! I love these so much because the possibilities are endless and there’s really no wrong way to do it. I do have a few little tips and tricks to give you the best outcome. Today I’m going to show you the spray paint method for making a hot mess canvas.
This post contains affiliate links. This just means that if you purchase something by clicking one of my links I may receive a small commission at NO fee to you.
Materials you’ll need:
Colored spray paint any colors of your choice. I typically use 2 colors but you can use as many as you’d like. It’s best to use a gloss spray paint.
Flat White spray paint or Primer This is to cover the canvas and needs to look as much like the original canvas material as possible. I typically use a flat white primer for this.
Vinyl stencil (You can buy these at any craft store in tons of different fonts and designs if you don’t have a Cricut to cut your own stencil.) Do not use permanent vinyl. Use a Cricut non permanent, Oracal 631 or Stencil Vinyl. The stencil design is totally up to you. You can create your own custom design or use your favorite SVG file.
Contact Paper This part is pretty specific. I don’t recommend using actual transfer tape or any kind of strong grip. It’s hard enough to get the vinyl to stick to the canvas you don’t want your transfer tape working against you! Your best bet is to use contact paper.

Instructions
Step 1:
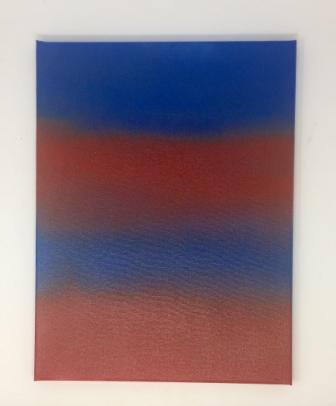
First, take your canvas outside to a well ventilated area. Spray the canvas in any pattern or design you’d like using 2 or more different colors of spray paint. It does not matter if the colors overlap and there does not have to be any specific pattern. Let the canvas dry for 24 hours (you can test it earlier and if it’s fully dry go ahead and move on to the next step).

Step 2:
Once your hot mess canvas is completely dry, apply the vinyl stencil. In the video below I show you some little tricks to getting the stencil to stick to your canvas but mostly, it’s just patience and work. If you’re making a large design, cut your stencil into smaller parts to make it easier to apply. Use your scraper to hold down the letters while you peel the contact paper off. Get rid of excess contact paper as you go and most importantly…go slow and TAKE YOUR TIME!
Step 4:
Now that you have your stencil applied to your hot mess canvas you need to heat it up to help it adhere and make sure you don’t get any paint bleed under your design. Grab a blow dryer and apply some heat to your stencil using the high heat and low blow setting on your blow dryer. Make sure you are aiming straight down at your vinyl and not at an angle. If the air catches under the side of your design it can blow it up and off your canvas. (You’ll notice I did that in the video…oops)
Step 5:
Once your stencil is applied to the canvas, take it back outside and spray on the top coat. This is where you’ll use the flat white spray paint or spray primer. Cover the entire canvas including the sides in case you got any of your colored spray paint on the sides. You’ll want to do two or three coats of white to make sure there is no color showing through. Hold your spray can straight down when you’re spraying. Just like the blow dryer, if you come in at an angel you risk spraying under your stencil and you’ll get bleed under your design.
Step 6:
Let your canvas dry for about 10-15 minutes and then use a weeding tool to pull off your stencil. You want to do this while the paint is still somewhat wet so the stencil does not pull of any dry paint and ruin your design. Go slowly here again and take your time.

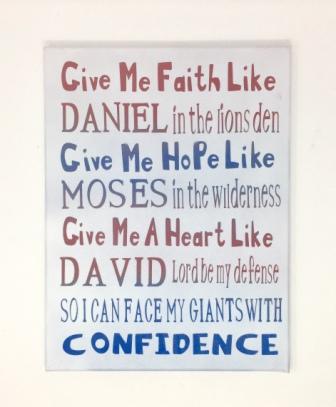
That’s it; your hot mess canvas is all done. Let it dry and then show that baby off! Check out the how to video below.