By now I’m sure you’ve seen an amazing Embroidery Hoop Christmas Wreath. They’re starting to pop up everywhere on Pinterest and they are just so darn cute! In today’s tutorial I’m going to show you how to make 2 different styles of the Embroidery Hoop Christmas Wreath.
This post contains affiliate links. This just means if you purchase something by clicking on one of my links I may receive a small commission at no cost to you.
- Here’s what you’re going to need:
- 12” Embroidery Hoop
- Fabric of your choice (for the fabric wreath)
- Burlap ribbon or a sash (for the sash wreath)
- Floral Picks of your choice
- Hot Glue Gun and Hot Glue Sticks
- Twine
- Wire Cutters
- Iron on decal (optional)
- Iron (optional)
Step One:
First you’ll need to prep your embroidery hoop. If you like the natural wood look, no prep is necessary. If you want to jazz it up a bit you can stain or paint the hoop. If you are making an embroidery hoop Christmas wreath to sell, I suggest staining the entire hoop including the inside of both pieces. For my own personal wreaths I just paint or stain the parts you can see.
Step Two: (For wreaths with fabric)
Next you need to add in your fabric. If you are adding fabric simply cut the fabric of your choice so that you have about an inch or so of fabric hanging over all sides of the hoop. Place the inner hoop (the one that does not have the twist fastener at the top) on a flat surface and then place your fabric over the hoop. Line it up so that it is straight and then place the outer hoop over the fabric and the inner hoop. Tighten the fastener until your material is pulled tight into the hoop. You may need to do a little pulling of the fabric here and there to get it straight and tight.
Turn the hoop over and start to glue down the excess fabric around the back. Just place small amounts of hot glue along the inner hoop and stick your fabric down to it bit by bit. Take your time and work your way around the wreath until you have it all glued down.

Step Two: (For wreaths with a sash)
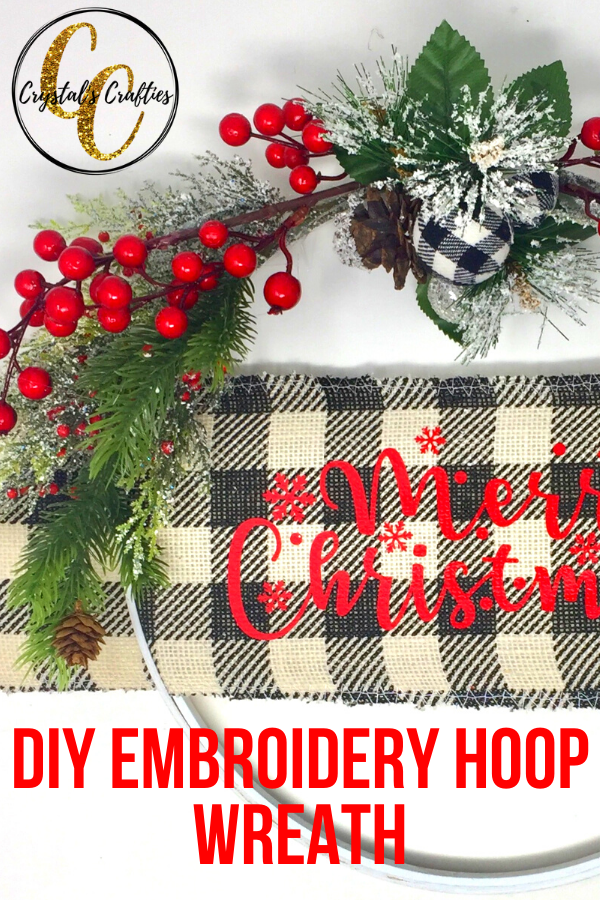
Here is where you’ll add the sash to your embroidery hoop Christmas wreath. I used a 5” buffalo check burlap sash but you can use whatever you’d like. Simply Place your sash or ribbon across the hoop and eyeball how long you would like it to be. You want tails to stick out on either side of your wreath. Cut the burlap or ribbon once you decide how long you want it.
Place the inner ring (the one that does not have the twist fastener at the top) on a flat surface and then place your sash over it. Line it up so that it is straight or at the angle you want and then place the outer hoop over it. Tighten the outer hoop until the sash or ribbon is tight between the 2 hoop.

Step Three: (optional decal)
Now it’s time to add the iron on decal. You can actually do this part before you place the fabric or sash inside the hoop or you can take your material back out of the hoop and use the creases as guide lines to place your decal. You’ll see in the video that I placed my sash in the hoop first to get the creases and then took it out to iron on my decal. You can get iron on decals from any craft store or there are several on Etsy.com you can buy. I also sell them in my Etsy shop. Just follow the instructions that came with your decal to iron it on.

Step Four:
Once your Embroidery Hoop Christmas Wreath is assembled it’s time to add the decorations. In the video you will see me adding Christmas picks and berries to my wreath. You can also add a bow which I have an example of for you to see as well. For this part you may need to use wire cutters to cut your picks down to a size that will work well with your wreath.

Start by laying out the picks in a pattern that looks good to you. Layer longer picks on bottom and smaller picks on top. Once you have an idea of where you want everything to go you can start gluing it all down. Use small amounts of glue at first to get everything into its place. Once you have everything where you want it, go back and reinforce with more hot glue…like A LOT MORE lol.

Step Five:
Your Embroidery Hoop Christmas Wreath is all done. You just need to make a hanger. Use some twine and run it through the metal twist fastener then tie a knot at the top. That’s it, you’re all done. Sit back and admire your new work of art.
