There’s a free and easy way to make your own PNG files using Inkscape. You can use these files to create all kinds of print designs like t shirts, Cricut Print and Cut projects or even printables to sell online. Knowing how to make your own PNG files will come in handy for tons of projects. This tutorial will cover text and patterns.

First you’re going to need Inkscape. Click here to get the free and safe download and just follow the instructions to install it on your computer. Once you have Inkscape installed open a new project and insert some text.
Create the text
Click the text icon (see pic below) and then click in the work area to bring up the cursor. Enter the text you’d like to make into a PNG. While your text icon is still highlighted you can go up to the top and change the font. Inkscape will have any font that is already downloaded on your computer. It doesn’t have its own fonts. To learn how to download fonts onto your PC watch this video.

Once you have the words and fonts you want you can change their color by first, clicking the selector tool on the top left (see pic above) and then selecting the word you want to change the color of. Once your word is selected go to the bottom color menu and choose the color you’d like your word to be.
Making it look good
Arrange your words in the position you’d like them to be and size them however you’d like. To resize your words you’ll first need to lock your screen. To do this just go up to the top menu bar and click the little lock icon (see pic below). Now that your screen is locked you can resize your words without them losing scale/proportion.
When everything is arranged, sized and colored just the way you want it to be simply drag a box around your entire design and go to “Object” and then “Group”. This will group your design together so that when you move it around it all stays together. Move your design so that it all fits into the work area on your screen and then go to “Export PNG Image” in the right menu bar and then “Export As…”. Here you will name your design and decide where you want to export your PNG. Once you have it named and have decided where you would like the designed saved, hit “Export” and you’re all done.
Adding patterns or textures
Another fun thing to do when you make your own PNG files is to add some pattern or texture to your design. To do this you’ll first want follow the steps above for creating the design and then instead of changing color you can insert patterns or textures. The patterns and textures come from digital paper so you’ll need to have some downloaded on your computer. I get all of my digital paper from Creative Fabrica. I have a subscription so I get everything for free (after my monthly subscription fee).
Just search for whatever kind of patterns or textures you want for your design. I did rose-gold foil for my design. Once I downloaded the digital paper I could import it into Inkscape. To import the paper just head up to “File” and then “Import”. From there you can choose the paper you want and click “Open”. This will put the paper into your project. A little box will pop up. Just leave everything like it is and click “OK”.
Import digital paper
Once the paper is imported into your project make sure it is large enough to cover the word or words you want to fill with that pattern. Make the paper larger or smaller if needed. When you have it sized go to “Object” scroll down to “Pattern” and then over to “Object to Pattern”. This will turn your paper into a pattern that can be used in Inkscape. At this point you can either delete your digital paper or move it out of your way.
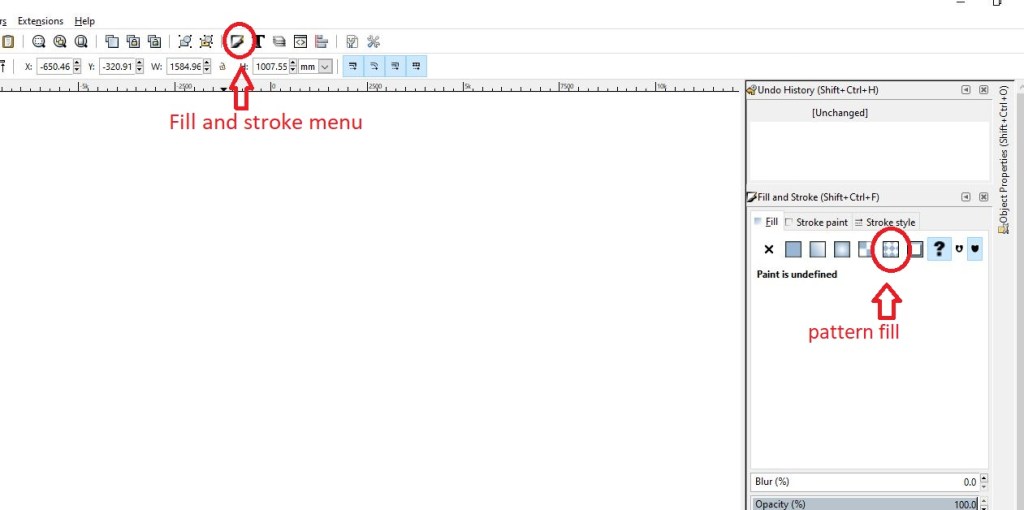
To fill your word with the pattern you just imported simply select the word and then go over to the fill menu (see pic above) and then click the pattern box (again, see pic below). This will automatically fill your word with the digital paper you imported. From here you follow all the same steps to save your design. And it’s that easy to make your own PNG files in Inkscape.
