Distressed designs are a thing right now. They say everything old is new again and that is really showing in the vintage designs that are coming back in. Did you know you can make your own distressed designs in Cricut Design Space? You totally can. You can distress any design your little heart desires and in this tutorial I’ll show you how.
Making Distressed Designs in Cricut Design Space
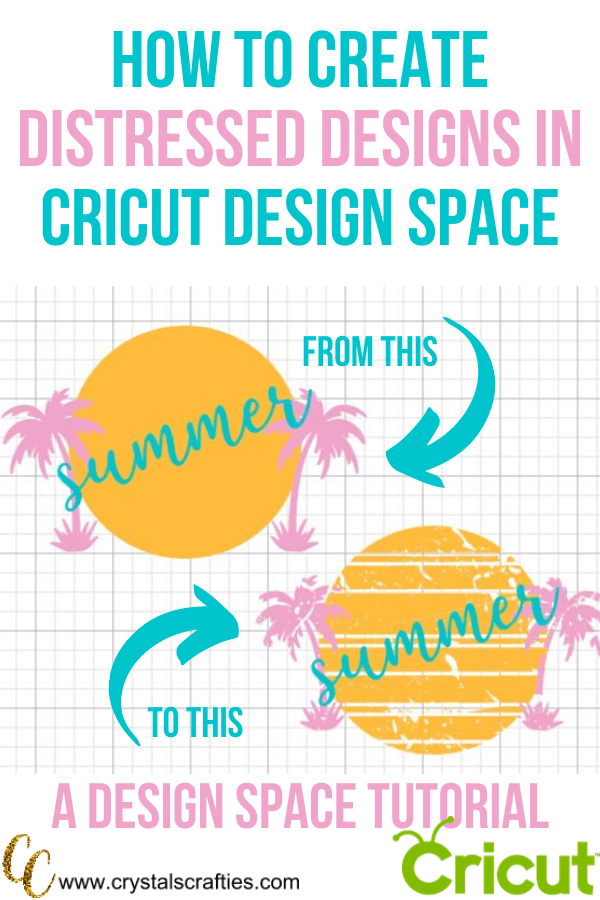
There’s really only one thing you’ll need to make these distressed designs and that’s a distressed template SVG. You can click the link to purchase the one I use in the tutorial for $1.99 or find your own online. Once you have that you can use it on any design you want. Here’s how it works:
1: Upload your SVG to Design Space or create your own design in Design Space.
2: Upload the Distressed Template SVG
3: Position the Distressed Template SVG over your design until you are satisfied with the look.
4: Slice the Distressed Template SVG out of your design and you’re all done.
Things to Remember
When using the slice tool in Cricut Design Space you can only slice 2 items at a time. You may need to separate your original SVG or design piece by piece so that you’re only working with 2 items at a time. The video above shows how to do this.
You can use the template to distress font too.
Check out my buffalo check template that can be used to create buffalo check designs in Cricut Design Space.

